Wednesday, April 30, 2008

The Ease of Straw Hat Making

My dear friend Teresa Wenzel is a master doll milliner and an excellent maker of all things fine and delicate. This article she wrote for Doll Costuming years back in '03 but it is worth re-printing. Michelle

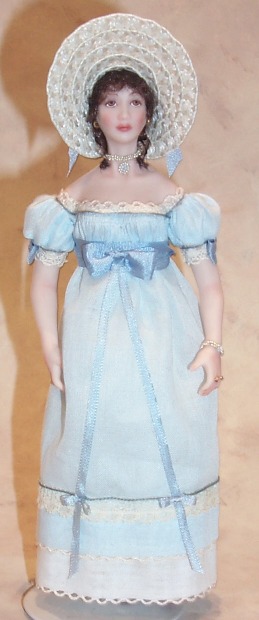
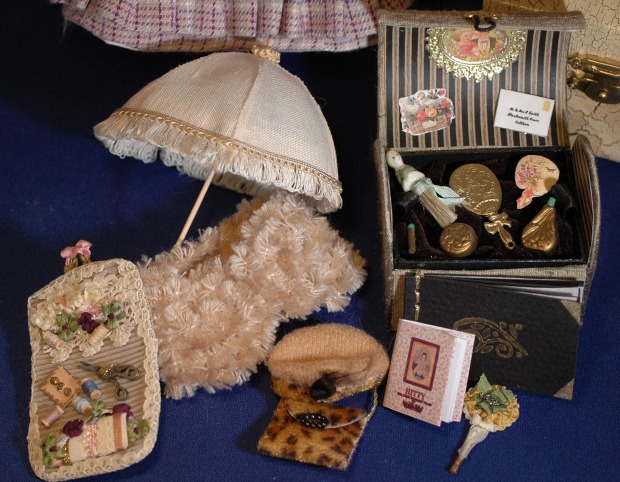
You can create the most beautiful and well fit hat designs for your dolls by simply easing the straw braid in and out as needed for your design. In designing doll hats, especially those of straw braid, I have found a wonderful use for my small treasures of fabrics, trims, laces and findings. Not large enough for most projects but too beautiful to waste I use these to embellish both cloth and straw hats. We have unlimited choices for our designs with so many colors and varieties of straw hat braid available to us today.
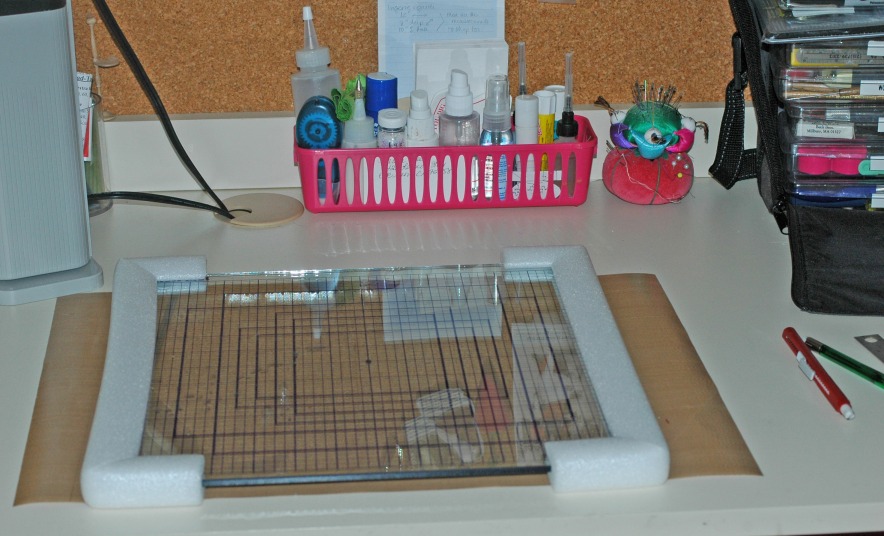
The straw braid is so versatile in designing not only for the antique reproductions but also for our modern dolls as well. And as it takes so little braid to make a small hat, it also takes not as much time as you would think. In measuring the doll’s head I use a circle template. I simply place the template over the doll’s head to the depth my design requires. I now use this size from the template to measure my progress as I sew the straw braid. Please remember to take into account the doll’s hairstyle when measuring.
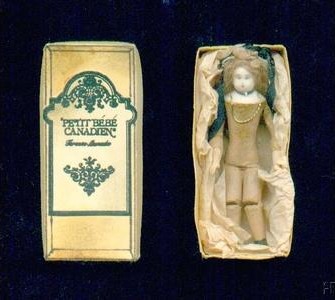
Let us begin with a “Mary Stuart” style straw braid hat for a Petite Milette.

Materials needed:
3 yds of 3/16” straw braid
Matching thread - use single thread to sew straw (wax thread for strength or use a Quilter’s 100% cotton glazed thread

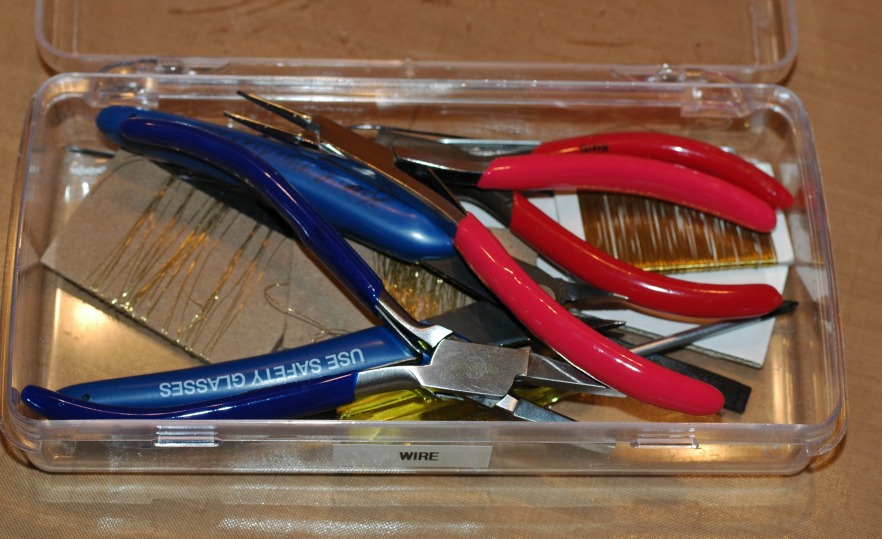
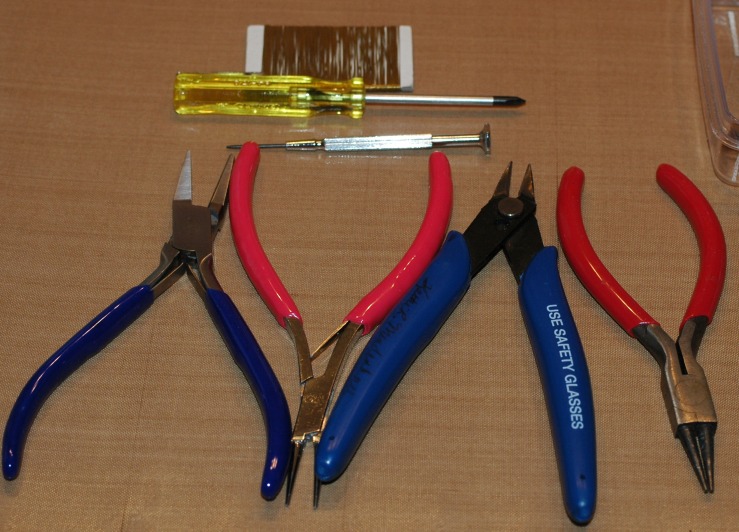
Milliners needle - these are long and sharp
10” of size 23 hat wire

Trims and embellishments of your choice

First, ready the straw by running firmly through your fingers to release any sizing and to make the straw pliable and easier to work with. You will need to do this throughout the construction of your hat. Find the pull thread at edge of braid and pull this carefully. This will cause the braid to curl and make it easier to sew in a circular pattern. Trim end and dot with glue and turn under to secure.
With matching thread sew braid in a circular pattern with a small even running stitch, keeping rows flat, easing in fullness of the straw braid. Always sew the straw braid under the preceding row. Do not pull braid snugly, just ease it in or out as needed. This is what causes crown to become pointy and/or too small. Sew 4 or 5 rows, each new row under preceding row. This should look like a flat braid disc approximately 1-1/8 inch diameter as pictured.Continue adding 6 to 7 rows tapering ever so slightly at this point to go from a flat disc shape to a curved dome shape. Once the curve is made do not ease straw in but sew to form the sides of the crown. Ease out in the last few rows to reach the head size of 1-5/8” diameter. A hat form may help you in this process. Begin brim by folding braid back on itself and stitching under the preceding row, easing in straw braid to form the wide brim. Stop this row at opposite side of hat just below center of braid disc as shown in the following diagram:
Repeat this row until you have 6 rows (3 fold backs on one side and 2 on the other). Each fold back edge will be a bit lower than the preceding one to prevent bulk. You can see in the following photo below. From the crown edge where it meets brim, you will be easing in the braid enough to make the brim flat. Please Note: If the brim becomes wavy, rather than flat you are easing too much.

After completing 3 fold backs on one side, rather than folding back when you come to the opposite side again, continue this row down and around back of hat and then again, all around hat, making an additional 2 rows as shown in this photo.

End the last row easing the end of straw under the preceding row, keeping a nice continuous curve along edge as in Diagram G. Cut straw braid and dot end with glue to secure it under preceding row. Knot and cut thread.Attach wire to the underside of brim edge with an overcast stitch. 
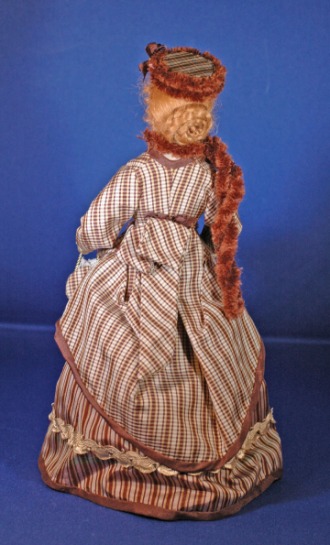
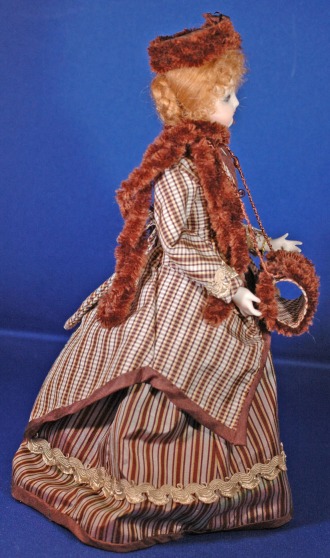
Shape wired edge brim to your design shape. Glue or sew lace to underside of brim to cover wire. Decorate to your hearts content!
By Teresa Wenzel
Terry sells some of her fabulous Antique laces and trim on her Etsy site:
Evertales.etsy.com
She also has doll millinery patterns for sale on minidolls.com.


Thank you for visiting our blog and hopefully you enjoyed the article.

Just as a gentle reminder, that tutorial was written to help to stimulate your creativity.

This Tutorial, Pictures, & Instructions are copy-righted & are not to be used as a tutorial of your own.

This means you may not copy and post this tutorial to your own website, or print it out and sell or distribute it as your own.

Tuesday, April 29, 2008

French Hand Sewing

How do I keep my hand in a practiced at "real" sewing? I get invited to a shower for one of my special friends. I knew my friend Jeanine was having a baby girl. This is from a pattern from a local French Hand Sewing artist. (I mean she is an artist with a needle!) Using her pattern I was able to make Ally's dress. The dress is made with Swiss Batiste and French laces. It is French Hand sewn, and using a machine as well.

Do I have any of these dresses, well I do have a few and we'll be seeing them in the future. I seem to give most of them away. But they come from my heart and my hands. In coming articles I will point out a few I have made especially for dolls or display and have kept.

These same techniques can be used on your dolls as Michelle carries the finest Swiss Batiste from Bear Threads called Bearissima. It comes in White, Ivory, Peach, Lt Blue, Mauve, Ivory and Ecru. If you have never worked with fine batiste like this it will be a treat. She also carries a full range of French and English cotton laces.

Kathi

Friday, April 25, 2008

One of My First Doll's

This doll was dressed by myself...wwwaaaayyyyy back in time. I do not even think it is sewn at all. I had to be in middle school. I still have this poor little thing. Michelle

Tuesday, April 22, 2008

My First Doll

We all begin somewhere, and after years of sewing for my friends, family and myself, I fell in love with miniatures. What's not to love. Since I made wedding dresses, Christening gowns and special occasion clothing, it was appropriate that my first miniature doll be a bride as well. Since I like whole vignettes, I needed help and received it from many places. And I received so much encouragement and great constructive advice from the local miniatures shop. I purchased the porcelain parts, created the doll, bought the basket, the bench and the cat. The dress and flowers and vignette were created by me. Kathi

Monday, April 21, 2008

Regency Doll

Here is my version of Regency style. Michelle

Sunday, April 20, 2008

What Inspires you?

I get my inspiration from several places, but all of us have our favorites. Bringing the picture to life in miniature produces quite a few challenges. Here I found several challenges and it began with the mannequin itself. My inspiration photo is from a museum display. Having been to a traveling show from the Cincinnati Museum I was able to see these figures first hand. I borrowed a photograph from the internet to show the mannequins prior to be dressed. I created the porcelain in white and used silk paper for the hair. The original suit was of linen. Swiss batiste and china silk for the lining were my choices for the miniature model. Particularly difficult was creating the "spines" for the parasol and I actually wove the "straw" for the hat using embroidery floss, 1 strand. In creating miniatures one must get creative, but with computers and art equipment getting better, easier and more available, anything is possible. For this presentation, I added an Art Nouveau pin on her lapel and a beaded bag. Kathi

Wednesday, April 16, 2008

Empire Period of Fashion

Fashions of the time reflect the Empire style (1795-1820). The fashion trend in the late years of the 18th and early 19th centuries was influenced by Classical Greece: high waisted gowns with long thin muslin skirts and long stoles. For more about this period check out this link to Wikipedia and The Costumer's Manifesto, they are sure to inspire you in your doll making endeavors. Michelle
Paris 1811 Day Dress
Paris 1812 Day Dress1812 Seaside Costume LondonPlates from the University of Washington Libraries, Special Collections Division.

Tuesday, April 15, 2008

Fashion Accessories for a French Fashion Doll

Any Victorian woman worth her salt would have these fashion accessories on hand. Many of these items are projects and gifts from sharing friends. Some of these projects you will recognize from popular magazines or miniature books. There is also a Hitty Book from Ann Venture's PaperMinis. The parasol handle and tutorial are available at www.minidolls.com. The accessories pictured are sized for an 8-9 inches French Fashion. Kathi

Monday, April 14, 2008

8 1/2" French Fashion

Miniatures are so often "French Hand Gluing" as Susan Sirkis says in her Wish Booklets. So, how does one who sews keep their skills up? By making clothes for larger French Fashion dolls. Here is an 8 1/2" French Fashion (Jumeau reproduction) The fabric was a large human size plaid, so I made the skirt and the jacket from different portions of the plaid. It turned out really nicely. This dress was made from a Susan Sirkis pattern published in Doll Costuming published March 2003. The magazine is now Doll Crafter and Costuming. http://www.dollccmag.com/
What fashionable lady would be caught without her "fur" accessories? She has a chenille pillbox hat, stole and muff. The purse completes the ensemble. Oh, yes, the "buttons" are genuine amethyst beads. She sets the pace of the time!
Kathi


Wednesday, April 9, 2008

New Limited Edition Silks

I have just made a purchase of these limited edition silks. I only have a limited supply...so when they are gone they are gone. Follow this link to view on minidolls.com. Pics below smaller than acutal...see my website for better scale of design size. Michelle
Pink Multi Stripe Silk Shirting
White/Black Silk Crepe de Chine
Black Stripe Silk Shantung
Navy Stripe Silk Dupioni
Blue/Silver Silk TwillIvory Stripe Silk Organza Olive Silk Tone on Tone Stripe
Purple Silk Tone on Tone StripeDk Olive Silk Tone on Tone Stripe
Silk Floral Jaquard

Sunday, April 6, 2008

Show and Tell - My Little Doll

I was organizing my pictures on my hard drive playing with a new software download from Google called Picasa (which is pretty cool and free). I stumbled on this picture. I sometimes just save picture of little things I luv...not owning them. But I kind of remember owning this. So I had to look threw my precious miniature collection and see if I could find her. And there she was. This wonderful little doll is 2" tall. She has a REAL leather body. I remember now I got her on Ebay BB (Before Babies) many many moons ago. I am so glad I own her. I hope you like her too. Michelle

Saturday, April 5, 2008

Tools of the Trade - Also stuffed inside the Box

Since we have discussed so many tools this week, I thought I would share what I sometimes stuff inside the box. Neatly stuffed in the back behind the plastic boxes is a circle template and a small self healing cutting surface. The circle template is a must have for miniature hats. I also have ovals, ellipses and squares. But they are tucked away in a sometimes used folder. (the Expressions cutting mat was a freebie. I LOVE the magazine. So creative.) The mat is about a 5" x 7" mat. Very convenient for traveling.

In the picture of the travel bag closed you will see another tool I keep handy. My friend bought me this for my birthday last year and I don't go anywhere without it. Shown open the Omnigrid has an ironing surface and a cutting surface. Fabulous tool! You've got to love quilter's!

The work surface is covered with a nonstick ironing pad. Bakers call them silipads. (Silicone coated fabric) That is the brown pad underneath. The class sheet is used in scrap booking, but I use it for pattern drafting, and many other things. It is great as a non stick surface and easily cleaned as well. When I am not working I leave the protective sides on it.

The long hot pink plastic basket in the back has cleaner for my glasses, glue sticks, Glove in a Bottle (wonderful for your hands) more glue, glue bottle, water spritzer and Fray Check. You'll see pin cushions and extra lighting. What is not pictured here is my magnifiers. I use the kind that clip to the front of my glasses. Often these are also found in quilt shops.

This concludes the travel bag and organized desk section. I look forward to bringing you another section for Tools that will show you the various jigs I have and use. There are some pretty creative ones , too. If there is anything about the tools you would to know or see demonstrated, let us know!

Wednesday, April 2, 2008

Tools of the Trade - Box 6 - Wire

Wire! We are getting to the end of the tool box now. It is obvious that I cannot put too many tools in this box, so choose your very favorites. These are mine.

The first set of "pliers" has a flat wide jaw. (3/8") It is of very good quality. With red handles the next set is a fine nosed rosary pliers. (I think these are also called chain nose, but I could be wrong) Wire cutters are next with blue handles and rounding out the pliers are another set of rosary pliers that are larger. Please buy the best quality you can afford. The results are worth it. At the top is a bit of wire just in case, a small Phillips head screwdriver and a small jeweler's flat head screwdriver.

Arrange these neatly as the plastic could crack.

Tuesday, April 1, 2008

Tools of the Trade - Box 5 - Write

Write. Well, is there anything to say here? Well, maybe a few notes. Filled it looks like a child's pencil box, but my pens and pencils are a little more special. Well, I am going to tell you that anyway!
Here's what you'll find as my favorites, the ever popular ball point pen. The cool thing about the ball point is that if you scrapbook, you can use your own writing, sprinkle your embossing powder on it and heat with the embossing gun. There you have a beautiful embossing in your own hand. Next is a metallic pen. Pictured is gold, but I have silver as well. A mechanical pencil is a must, as well as replacement erasers and leads. I also have, but not pictured here is the click eraser. Love it. The large art eraser and a pencil sharpener for colored pencils, regular pencils and my watercolor pencils. Sharpies, or permanent markers in both sizes. (I also use the fine Sharpie to write my name on all my tools.) finally you will see a Micron pen. I have a set of these in several sizes and colors.
Other really important and valuable tools you might consider are water and air erasable fabric markers and quilt marking pencils. I use a white for dark fabrics and black for light fabrics.